
By Lauren Cox and Porter Mitchell (former Farmer Services Coordinator)
Lauren Cox is the Director of Farmer Services and Porter Mitchell was previously one of two Farmer Services Coordinators.
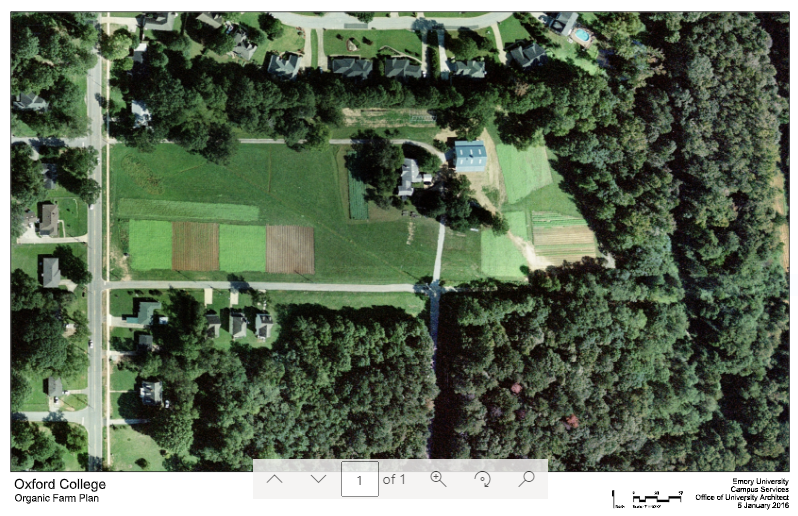
In December 2021, Georgia Organics partnered with Oxford Organic Farm located at the Oxford at Emory campus in Covington Georgia to host an on-farm Field Day and crop rotation work session. Roughly 20 farmers from across the state—from Atlanta to Athens to Albany to Blackshear—gathered on the farm on a frosty morning.
The day began with a tour of the farm led by farm manager Daniel Parson and his farm crew. Attendees walked the farm to see Oxford’s rotation in action and discuss the specific benefits of cover cropping. Parson also showcased the farm’s riparian buffers and shared his experience with using flowering cover crops to attract beneficial insects.
In the second half of the day, attendees headed to a classroom with a presentation by Parson followed by a hands-on work session where farmers could work on their own rotations with help from Oxford Organic Farm and Georgia Organic Staff.
Here are some key takeaways and a step-by-step process for beginning to create your own crop rotation!

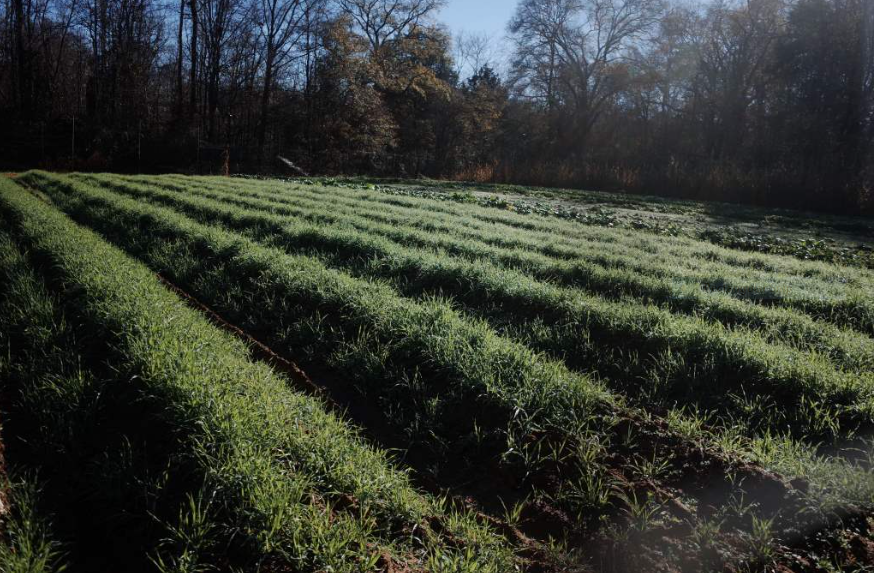
Courtesy of Oxford Organic Farm
Why have a rotation?
A rotation is a key component of a sustainable farm. It is important to rotate between crop families, incorporate cover crops, and rotate heavy feeding crops (crops that have high nutritional needs or are in the ground for more than 60 days) with light feeding crops and short crops.

Example of pest control hierarchy pyramid, courtesy of Penn State Extension.
A crop rotation is a part of what sustainable, regenerative, and organic farmers call a “cultural practice.” This means that it is a foundational tool for a healthy farm and does not rely on chemical/biological inputs for fertility and pest/disease control. Cultural practices form the bottom of the pest control hierarchy pyramid, meaning it is the one you should use most often and as your first line of defense.
A crop rotation can help prevent pest issues, replenish nutrients in the soil, create a healthy soil ecosystem, and can help defend against soil-borne diseases.
Interested in organic certification?
Having a crop rotation and using cultural practices as a first defense is a requirement for farms to earn and keep organic certification!
Courtesy of Oxford Organic Farm
Building a Crop Rotation 101
Step 1 (in the field): Divide your fields
“You need to go out and measure your fields. I guarantee if you guess you’ll be wrong every time,” says Mary. Use a walking measurer to measure the length and width of your fields.
Step 2 (in the field): Standardize, standardize, standardize!
Try to make all of your bed sizes, rows, row spacing, and field sizes as identical as possible. If your fields are different sizes, divide them into similar units. For example, if you have three 50 foo50-foots and then two 100 fo100-foots, divide your hundred food fields in half to make 50 foot sections.
Step 3 (on paper): Decide on your crops
Write out a list of all of the crops you want to grow and the season when you will plant them. Even if you have sequential plantings, identify the season in which they’ll go into the ground first.
Step 4 (on paper): Calculate how much space each planting with take up
Think about the yield you would like from each crop. Then, calculate how many row feet you’ll need of that crop to grow your desired yield.
Step 5 (on paper): Start to plug and play on a spreadsheet that represents your fields!
Download this rotation template, based on the Oxford Organic Farm model or create your own in Excel. Begin placing crops in your fields based on when they will be planted in the ground. Divide your cash crops across all your fields and mix up the planting pattern (ex. Field 1 has a summer cash crop; Field 2 has a spring and fall cash crop. Do this until you have 75% of your cash crops in the rotation then move on to fill in your cover crops. Also, do not place crops from the same family or heavy feeders in fields near each other.
Step 6: Plug in your cover crops
Identify the date(s) you would like to harvest your cash crop (based on when you plant them in Step 5. Then, slot in an appropriate cover crop based on when you’d like the next cash crop to be planted in the field. *Your goal is to have the cover crop reach its full potential, sometimes this is right before flowering, sometimes this is based on height. IDEALLY, you would have 1-2 cover crops in each field per year. This may look like:
Step 7: Return to filling in cash crops, taking the rest of your list and filling plantings in behind your cover crops.
Guess what? Now, not only do you have your rotation, but you have your planting schedule too!
Crop Rotation Tips and Things to Remember:
Update your rotation as needed. No one needs to tell a farmer that it’s an unpredictable endeavor. Life and Mother Nature throw all kinds of things your way! Update your rotation to account for changes like crop failures, adding new land, changing which cash crop to plant, etc.
If you have short-term crops that don’t need entire beds, you can group them by how many weeks they’ll be in the ground and can pair them together within one bed, flip-flopping them as you clear the bed and then replanting.
COVER CROPPING
Cover Cropping on Raised Beds by Kayla Williams
A crop rotation allows you to plan for cover cropping rather than treating it as an afterthought. There are cover crops for every season and for the different lengths of time you want them to be in the ground. With all cover crops, putting the maximum amount of nitrogen and bio-mass they offer back into your soils is key so use them wisely and based on how long they need to be in the ground before you plant your next cash crop. *This is true even if you crimp them and use them for mulch.
If you want to plant an early spring cash crop, then consider a prior winter planting of: winter oats, Austrian winter peas, or crimson clover.
If you want to plant an early summer cash crop, then consider a prior winter planting of: hairy vetch, winter rye *Abruzzi, and clover.
If you want to cover crop in the summer in a 1-1 ½ month window between spring and summer crops (for most Georgians this is in May), then consider using: buckwheat or millet.
You can also do the same for the window between summer and fall.
If you want to cover crop in the summer for 2-3 months between an early spring planting and a fall crop consider using: sorghum sudan, cowpeas, or Sunn hemp.
A good rule of thumb for winter cover crops is to plant both a legume to increase nitrogen in the soil and a grass for increasing bio-mass and organic matter.
You can always check your local ‘feed and seed’ for cover crops. Just make sure they’re untreated and not GMO. Otherwise, you can also find cover crops that ship from: Welter Seed Company, Johnny’s Selected Seeds, Seven Springs,
Want to learn more about cover crops? Check out the excellent resources at SARE: sare.org/resources/managing-cover-crops-profitably-3rd-edition/
And check out this episode of the “Tractor Time” podcast on cover crops, soil health, and no-till farming Tractor Time #65 Rick Clark on Soil Health.
To learn more about Georgia Organics, visit www.georgiaorganics.org and follow us on Instagram @GeorgiaOrganics, Twitter @GeorgiaOrganics, and at www.Facebook.com/GeorgiaOrganics.